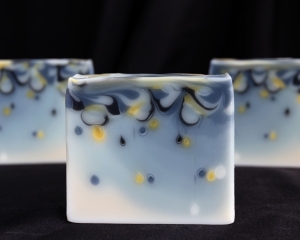
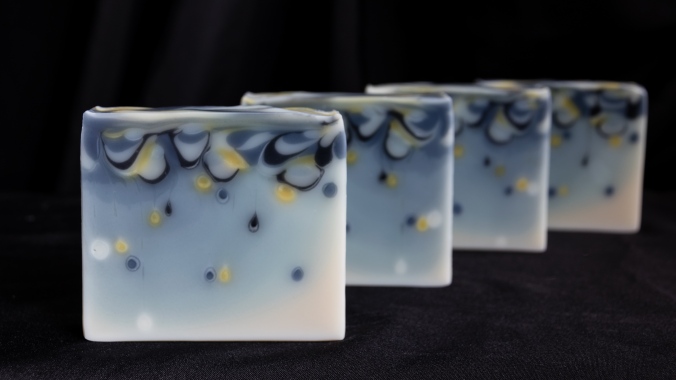
 The Soap Challenge Club is finally back and just as fun, educational, and challenging as ever. The September 2018 challenge was to create a mini drop swirl. If entering the advanced category, soap makers were to suspend drops of soap inside the base soap. After watching the instructional videos, I decided to attempt a soap that reminded me of a rainy day, with clouds above, raindrops falling, and a bluish, dark sky for the background. In my first attempt, the rain drops and ombre sky actually looked okay, but the top mini drop swirl part was lacking the drop…and the swirl. I only had time for one more batch and ended up with the soap you see here. The little drops were really fun to make, and I’ll definitely incorporate them into more soaps in the future. In my post below, I go into more detail about my recipe, my thin base batter causing a cool effect with the drops, and show more photos of the finished bars. I also made a video in case you’d like to see my entire process. :)RECIPE
This technique requires a slow moving recipe. So, I used one that I have really come to rely on for being slow to trace and that also creates a nice soap that I actually like to use. Doing an ombre for the base (which takes a lot of time) added to the difficulty for me, but I really wanted a gradient base in this soap.
The only issue I’ve had with this recipe is a grainy, false trace (due to the shea and cocoa butters) when soaping at lower temperatures. I’m usually a room temperature soaper no matter what kind of soap I’m making. With this batch, however, I soaped at 90ºF (in a warm room with low humidity) and did not experience a false trace. However, there have been other times I soaped at a similar temperature but actually had to stir through a false trace (perhaps the humidity was higher or the room was colder). If you do decide to try this recipe, just be aware this could happen. If you do experience a false trace, just keep stirring through it, and you’ll see the batter eventually smooth out. :)
Olive Oil – 42%
Coconut Oil – 25%
Shea Butter – 10%
Sunflower Oil (High Oleic) – 10%
Cocoa Butter – 5%
Avocado Oil – 5%
Castor Oil – 3%
Superfat – 5%
Sodium Hydroxide – use a soap calculator like the one at Majestic Mountain Sage to calculate the amount of sodium hydroxide required for your specific recipe.
Water = 2.2 x Sodium Hydroxide (31% lye solution)
Essential Oil Blend:
Sweet Orange – 1.5 parts
Peppermint – 2 parts
Star Anise – 0.5 parts
If you’re unsure as to how much essential oil to use in a recipe or just want to verify your own blends, Modern Soapmaking has a wonderful site called EOCALC where you can calculate blends and make sure your usage rates stay within the IFRA standards.
PREPPING THE SQUEEZE BOTTLES
To suspend mini drops of soap in the base soap, the squeeze bottle caps needed to be modified in order to reach deep into the soap. I decided to use my 7ml disposable pipettes. My idea was that I could cut the pipette tips at various locations and diameters to make the soap drops smaller or larger. Well, that didn’t work at all, but the pipette tubes made the perfect extensions for the caps. Drinking straws would also work, of course.


I used washi masking tape to secure the tubes to the tops, because it’s easy to remove. I wanted the “straws” out of the way when I did the mini drop swirl on top.
MAKING THE SOAP
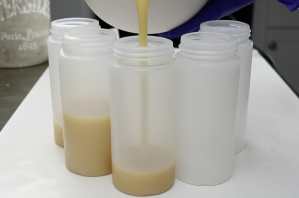
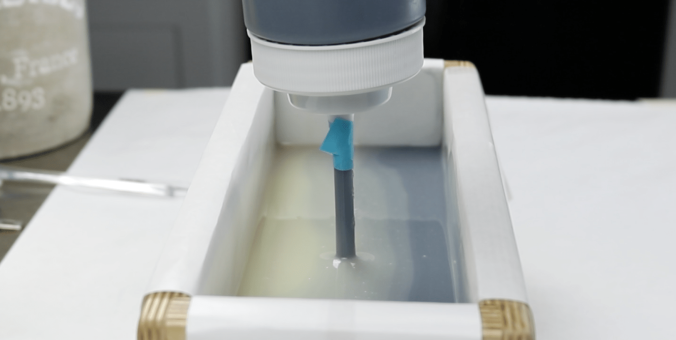
Because I wanted a fluid soap batter, I mostly hand stirred with occasional pulsing of the blender, checking constantly for oil separation on blender shaft. I tried to show this in my video, but my camera’s autofocus didn’t quite cooperate enough to actually see the oil separating on the blender. I show a photo (in the video) anyway, and you can at least see the difference in the batter. When the soap reached emulsion, I separated 40% of it into 5 wide mouth squeeze bottles and then set them aside. The other 60% of the batter was used for the base soap.
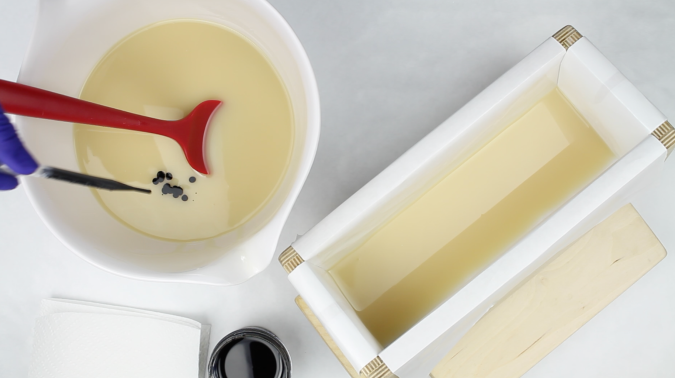
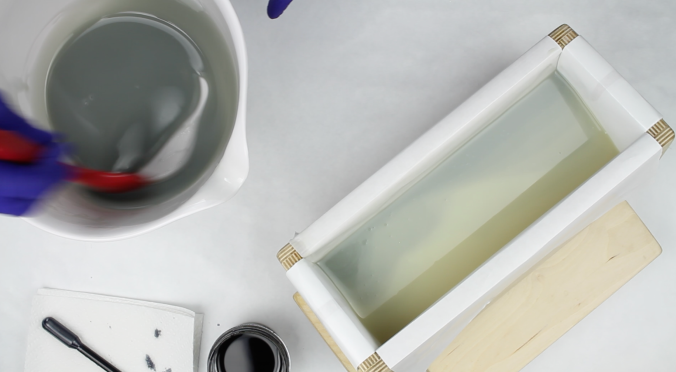
To create the base, I first added peppermint essential oil, stirred to incorporate, poured two passes of the plain white soap into the mold, and then began the process of adding drops of indigo oil (12 drops at a time), stirring, pouring, and repeating until I was out of soap. Thankfully, the soap remained thin and fluid the entire time.
After the base was done, I added the fragrance and colorants to each squeeze bottle.


Colorants:
Indigo Root Powder– ratio of 1/2 teaspoon indigo root powder dissolved in 1 tablespoon of sunflower oil (Amy Warden’s method)
Activated Charcoal – ratio of 1 teaspoon activated charcoal powder dissolved in 1 tablespoon of sunflower oil
Paprika – 2 teaspoons paprika powder added to 4 oz of olive oil (heated oil infusion method)
Coloring & Fragrance:
Dark Blue – 1 teaspoon indigo oil plus 1/8 teaspoon activated charcoal oil added to about 1 cup of soap.
Scented with peppermint essential oil.
Light Blue – 1/2 teaspoon indigo oil added to about 1 cup of soap.
Scented with peppermint essential oil.
Black – 1 teaspoon charcoal oil added to about 1/2 cup of soap.
Scented with Star Anise essential oil.
Light Orange/Yellow – 1 teaspoon paprika infused oil added to about 1/2 cup of soap. Scented with sweet orange essential oil.
White – no color or clay added.
Scented with peppermint essential oil.
Creating the Rain Drops
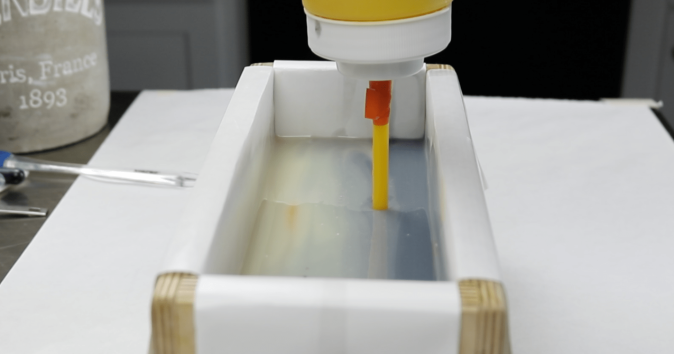
Before I started adding these drops, I was really concerned about my thin base soap. I knew it would eventually turn into soap, but it was taking its sweet time thickening up. I waited as long as I could but really thought all of my drops would just sink to the bottom. Well, some of them did sink a bit, but this created such a cool effect. In some bars, you can even see a little trail like a raindrop has run down the soap. :)
I initially had a plan in mind about where to place the drops, especially since part of my base soap was darker. However, at this point, I completely forgot about any previous plans. I just started adding colors, and, thankfully, they all showed up fairly well. I chose to use the light blue color only for the top of the soap, so there were dark blue, black, orange/yellow, and white drops added at varying heights. After inserting the straw where I wanted, I squeezed the bottles and moved down the mold, trying to remain at the same level all the way across. I really felt like I was squeezing too hard, but even with a thin batter, the squeezing was apparently necessary…even to create tiny drops. I also tapped the mold after I was done to remove any air bubbles.
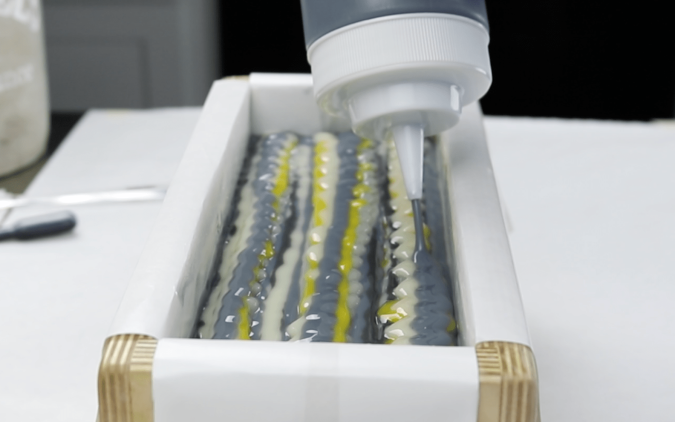
After the drops were done, I removed the pipette straws from the bottle caps and began laying down stripes of color. You’ll see in the video where I dropped one straw right into the soap. And I was being so careful. :) After the first lines were down, I tried to use the force of squeezing to help push the lines down into the soap to create the mini drop swirl. I think the weight of the soap on top of the thin base soap is actually why it sort of worked.
I finished the top using a glass stir stick (inserted into only the very top layer) to do a basic back and forth swirl.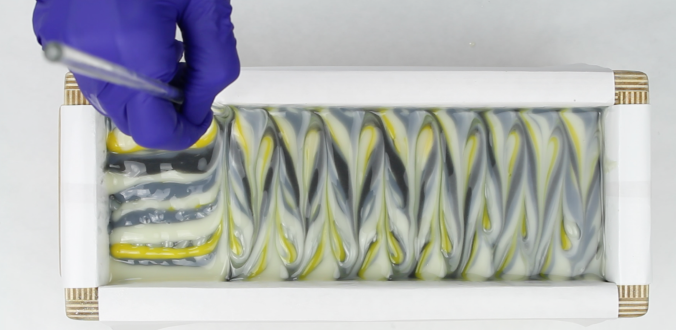
After the top was finished, I covered and insulated the soap with a blanket. I then let it sit (completely covered) for 2 days. It did go through gel phase which helped create more vibrant colors. Thankfully, I had no ash on top of the soap. After it was unmolded and cut, I let the bars sit another day to firm up even more, then I planed the fronts just a bit, trimmed the edges with a vegetable peeler, and set up for the photos you see below. I did decide to steam the bars, and that really made the soaps look smoother and helped show the contrast between colors a lot better.


VIDEO
Thank you so much for reading my post!


Holly, your soap is amazing and in regard with the video all I can say is wow!!!I am a messy soaper and your video is pure inspiration. I really enjoy it.
LikeLiked by 1 person
Thank you so much!! I’m a really messy soaper, but through the magic of editing, I hide most of my mess. Haha. :)
LikeLiked by 1 person
Wonderful video! Love how you captured the sky of the last few days in a soap! Incredible.
LikeLiked by 1 person
Thank you! :)
LikeLike
Holly, beautiful soap, design, colors, everything. Another masterpiece in the competition. The jury will have a lot, very complicated in September. Thank you for sharing the perfect video. I wish good luck in the competition !!
LikeLiked by 1 person
Thank you so much!! :)
LikeLike
it`s a really great Marvel soap.
LikeLike
Your control of trace is something to behold! Thanks for sharing this.
LikeLiked by 1 person
Thank you! :)
LikeLike
What an amazing soap! You are so talented!
LikeLiked by 1 person
Oh, thank you so much, Nicole! :)
LikeLike
Another work of beautiful and incredible soap, Holly! You are a true artist! Thank you so much for sharing the process. Your videos are inspirational and I always learn something!
LikeLiked by 1 person
Thank you, Annie! That’s so sweet of you to say. :)
LikeLike
Just beautiful, Holly! I love the ombre effect! Sometimes you just have a wing it, and I’m so glad it worked out for you. Great idea using the pipettes for extensions. :)
LikeLiked by 1 person
Thank you, Amy! This technique was so much fun. :)
LikeLike
I new it was your soap before I even followed the link. Stunning as ever!!
LikeLiked by 1 person
Oh, thank you so much, Janelle!! :)
LikeLike
Beautiful soap! Reminds me of rainy days in Seattle when I was a kid.
LikeLiked by 1 person
Thank you, Danielle! :)
LikeLiked by 1 person
You’re such an artist. Thanks for the time to make the video and detail it in this blog. You have a new fan!
Congratulations on this wonderful job.
LikeLike
Another amazing soap. Absolutely beautiful!
LikeLike
Oh my, Holly! I have been eagerly anticipating and hoping to see an entry from you! It was worth the wait, BIG TIME!
Thank you showing your method and for all the valuable tips and information. I keep forgetting about the EO calculator at Modern Soapmaking and I’m so glad you reminded me. I also have to say I’m so glad I’m not the only one who forgets my original plans 😁!
These are beyond amazing and perfectly capture the true mood of a rainstorm. I am thrilled to have the Challenge Club back and be able to reconnect with my favorite soap makers, especially you! Thanks for sharing your amazing talents with all of us!
LikeLike
Wow! So amazingly creative!
Thank you so much for sharing your amazing work out here. So helpful for those who are interested in soap making and using natural colorings
I have a question to ask you. Did you deduct the amount of sunflower oil from the recipe for making the colors? Or were they extra added?
Thank you very much
Love your works!
LikeLike
Geez, incredible, beautiful job! Rose Wood
LikeLiked by 1 person
Thank you!
LikeLike
Wonderful, beautiful, I fell in love
LikeLike